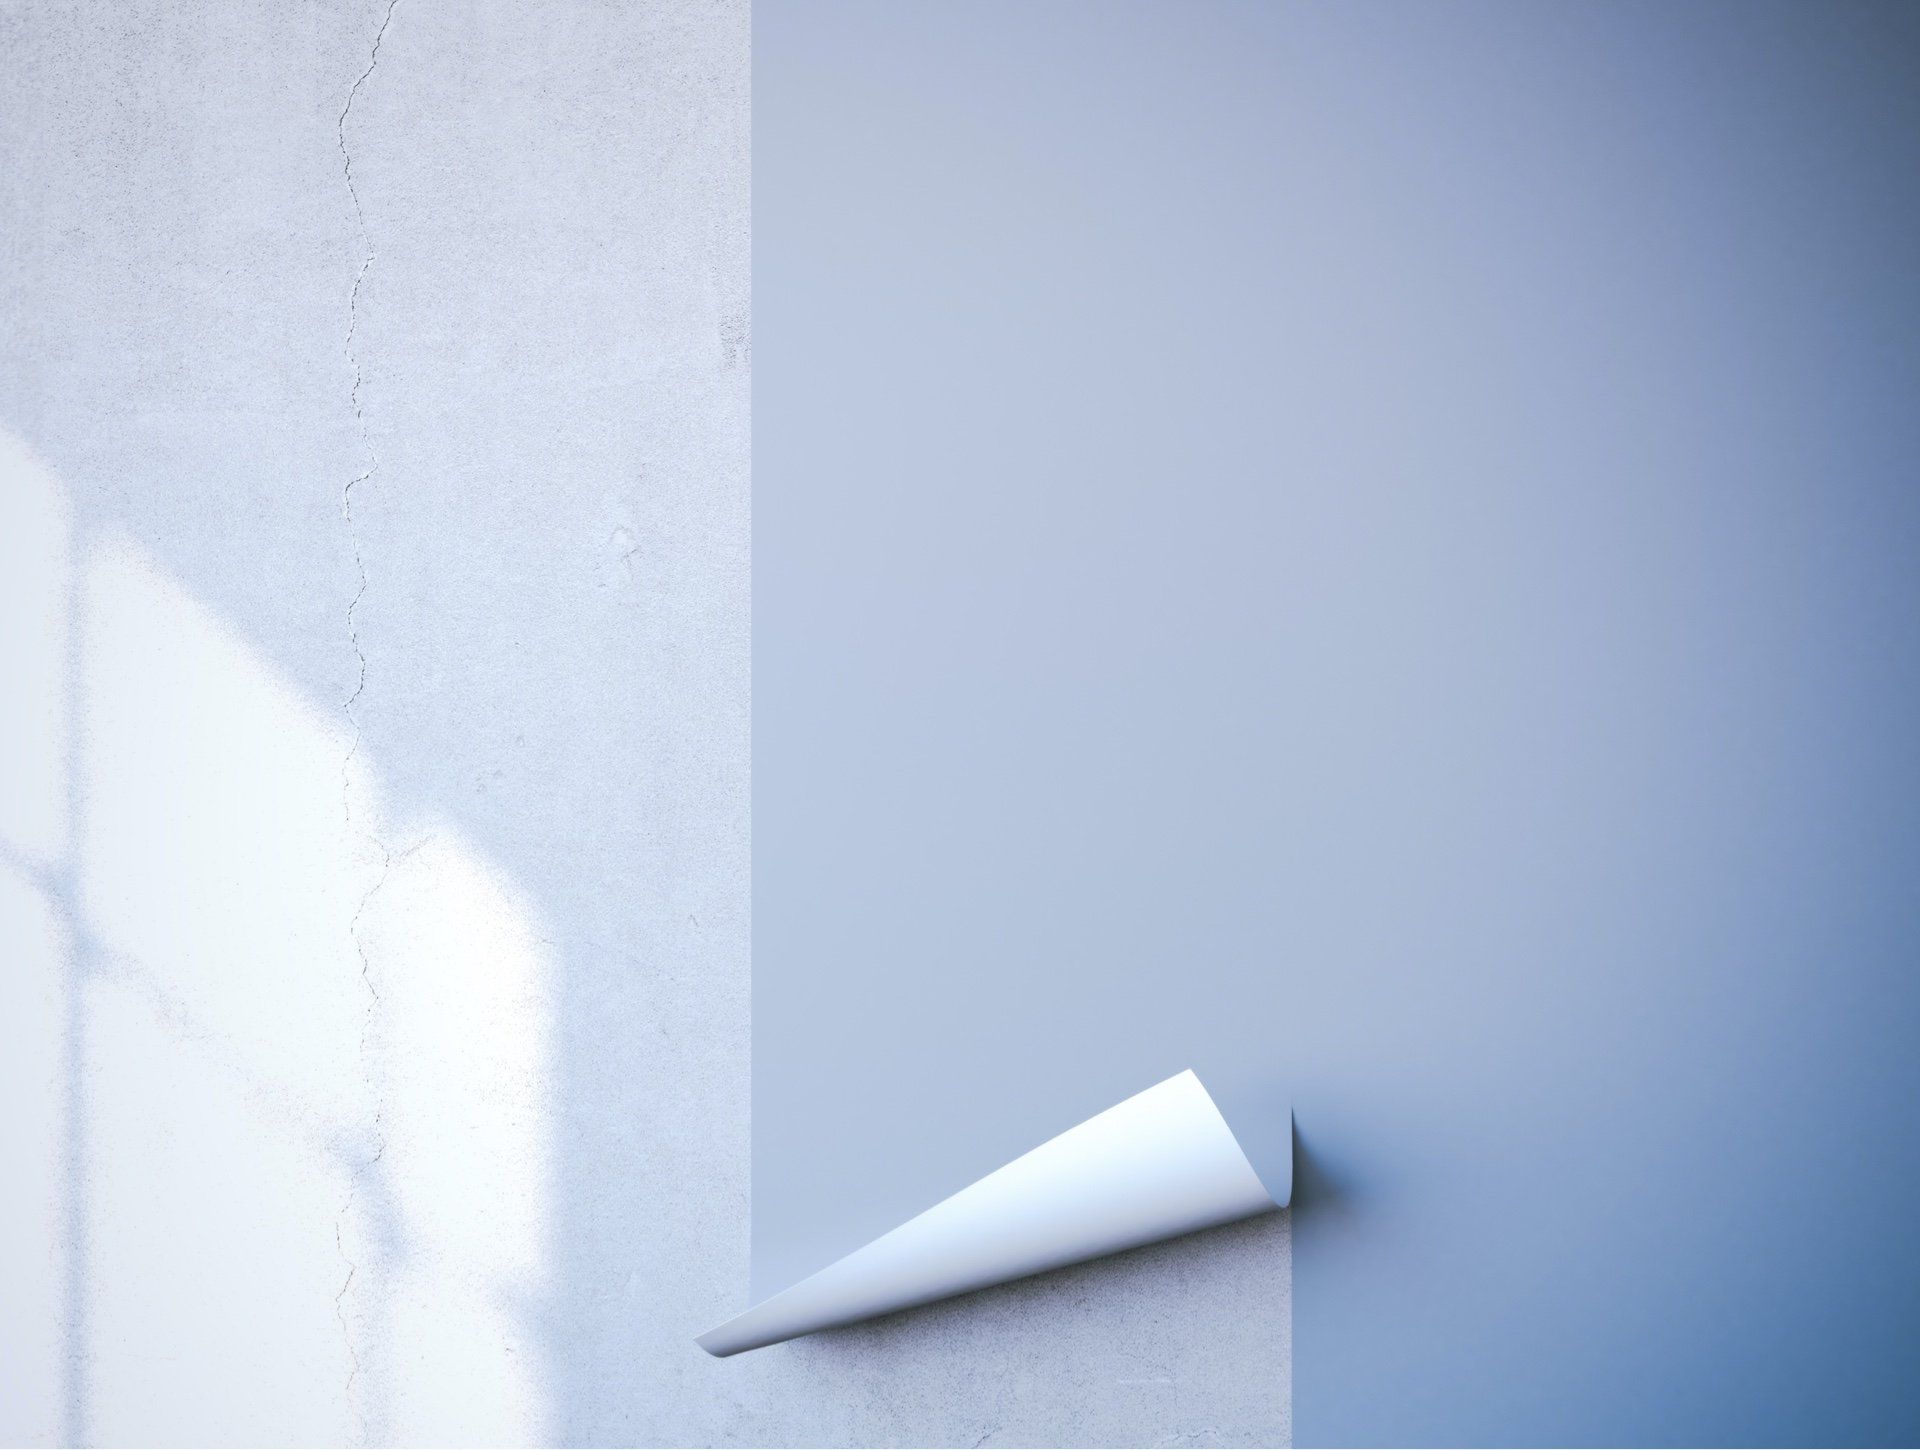
10 ESSENTIAL THINGS TO KNOW FOR YOUR NEXT WALLPAPER PROJECT!

10 ESSENTIAL THINGS TO KNOW FOR YOUR NEXT WALLPAPER PROJECT.
1.Choose the Right Type of Wallpaper for Your Needs
Choosing the right type of wallpaper is a must.
When selecting the right type of wallpaper for your needs, it’s important to consider not only the aesthetic aspects but also the practicality based on the location and the specific use of each room in your home.
Here's a look at the various wallpaper types and their optimal applications:
Understanding Different Types of Wallpaper
Wallpapers come in a variety of materials and styles, each offering distinct advantages depending on your decor goals and the room's function.
Here are some common types:
- Vinyl Wallpaper: This is one of the most popular choices due to its durability and ease of cleaning. Vinyl wallpaper is especially suitable for areas prone to moisture and heavy wear, such as kitchens and bathrooms.
- Non-Woven Wallpaper: Made from a blend of natural and synthetic fibers, non-woven wallpapers are easy to install and remove. They are breathable, which prevents mold and mildew, making them ideal for bedrooms and living spaces.
- Fabric Wallpaper: Offering a luxurious feel, fabric wallpapers add depth and texture to a room. They are typically made from cotton or linen and are best suited for low-traffic areas like formal dining rooms or master bedrooms.
- Paper Wallpaper: Eco-friendly and available in a wide range of patterns, paper wallpapers are perfect for spaces that aren’t exposed to high humidity or rough treatment.
Choosing Wallpaper by Room
The choice of wallpaper largely depends on the conditions and activities associated with each room:
- Kitchens and Bathrooms: Opt for vinyl wallpapers as they are water-resistant and can withstand humidity and occasional splashes. Their easy-to-clean surface helps maintain hygiene and appearance over time.
- Living Rooms and Common Areas: Here, you can choose from non-woven, fabric, or even designer wallpapers depending on the room’s theme and the level of traffic. These areas benefit from durable wallpapers that can handle frequent cleaning.
- Bedrooms and Private Spaces: Non-woven and fabric wallpapers are excellent choices here due to their aesthetic appeal and durability. They also allow walls to breathe, contributing to a more comfortable environment.
- Hallways and High Traffic Areas: Durability should be a priority in these areas, making vinyl and non-woven wallpapers suitable choices due to their resistance to wear and tear.
Considerations Before Making a Choice
- Durability: Assess the expected wear and tear in the area where the wallpaper will be applied.
- Maintenance: Consider how easy the wallpaper is to clean. Vinyl is typically the easiest, while fabric may require more careful handling.
- Installation and Removal: Some wallpapers, like non-woven varieties, are easier to install and remove without damaging the walls.
- Aesthetics: Choose a style and pattern that complement the interior design and colour scheme of your home.
- Cost: Budget constraints can also guide your choice. Vinyl wallpapers are generally more affordable compared to fabric wallpapers.
Choosing the right wallpaper involves balancing functionality with style. By understanding the different types of wallpaper available and considering the specific needs of each room, you can enhance both the appearance and the longevity of your home’s decor. Always consider the room's conditions and usage to ensure that the wallpaper not only looks beautiful but also stands up to the demands of its environment.
2.Choose the Right Adhesive for Your Wallpaper
When embarking on a wallpaper installation project, choosing the right adhesive is just as crucial as selecting the wallpaper itself. The durability and appearance of the wallpaper once applied largely depend on the type of glue used.
This guide will help you navigate the different types of adhesives available and advise how to select the best one for your specific wallpaper type.
Types of Wallpaper and Corresponding Adhesives
1. Standard Wallpaper
- Description: This includes printed papers and vinyl wallpapers that are common in residential settings.
- Recommended Adhesive: A clear or strippable adhesive works well, as it allows for easy removal without damaging the walls.
2. Heavy-Duty Wallpaper
- Description: Wallpapers like embossed or foil papers that require a stronger bond due to their weight.
- Recommended Adhesive: A heavy-duty adhesive with a strong tack is necessary to prevent peeling.
3. Delicate Wallpaper
- Description: This category includes natural fiber wallpapers which can be damaged by moisture.
- Recommended Adhesive: A non-water-based or acrylic adhesive will minimise damage during application and removal.
How to Choose the Right Adhesive
- Consult the Manufacturer: Always check the wallpaper’s packaging for specific adhesive recommendations. Manufacturers often specify the type of adhesive that works best with their product.
- Assess the Wall Surface: Consider the condition and type of wall surface. Porous surfaces, like bare drywall, might require a primer or a specific type of glue to ensure proper adhesion.
- Environmental Factors: For areas with high moisture, such as kitchens and bathrooms, consider adhesives that are specifically formulated to be moisture-resistant.
Tips for Application
- Test Small Area: Before applying the adhesive to the entire wall, test it on a small area to ensure it doesn’t cause any damage or discolouration.
- Even Application: Use a roller or brush to apply a consistent, even layer of adhesive over the wall surface. Avoid over-saturating the wallpaper, which can lead to bubbling or peeling.
- Adhesive Set Time: Follow the manufacturer’s instructions regarding the adhesive’s set time—some adhesives require a few minutes to become tacky before hanging the wallpaper.
Selecting the right adhesive is a key step in ensuring that your wallpaper adheres well and looks great for years to come. By understanding the different types of wallpaper and matching them with the correct adhesive, you can achieve a professional-looking finish that enhances any room.
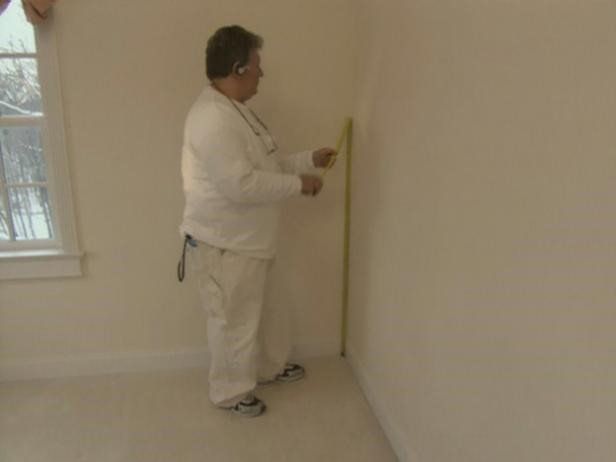
3.Levelling is Critical
Wallpaper installation requires precision, and one of the most crucial steps in ensuring a successful application is making sure that everything is perfectly level.
Let's look at the significance of leveling, practical measuring tips, and how to handle uneven surfaces.
The Importance of Leveling
Precision in Appearance
- Visual Appeal: A misaligned wallpaper can significantly disrupt the visual harmony of a room. It can make the entire wall look uneven or skewed, which is particularly noticeable with patterned wallpapers.
Foundation for Subsequent Sheets
- Alignment: The first sheet of wallpaper sets the precedence for the rest of the installation. If the first sheet is off, every subsequent sheet will likely inherit and magnify the initial error, leading to a progressively worse outcome.
Measuring and Leveling Techniques
Tools Needed
- Spirit Level or Laser Level: These tools are essential for ensuring your lines are straight and true. A laser level can be particularly helpful as it allows you to mark a level line across a large distance.
- Tape Measure: Used for finding the starting point and ensuring even spacing between wallpaper sheets.
Step-by-Step Guide to Leveling
- Measure the Wall: Start by measuring the height and width of the wall to understand how much wallpaper is needed and where to align the first sheet.
- Marking the First Line: Use a pencil and a level to draw a vertical line from the ceiling to the floor. This line will serve as a guide to align the edge of the first wallpaper sheet.
- Check for Wall Irregularities: Since buildings often settle over time, it’s possible for walls to be out of square. Use a level to check different areas of the wall and adjust your reference line accordingly.
Handling Uneven Walls
- Adjusting for Irregularities: If you find that your wall is not square, you may need to trim the wallpaper at the top or bottom to ensure it hangs straight. It’s important to do this judiciously to maintain the pattern alignment.
- Using Wall Liner: In cases of severe unevenness, consider applying a wall liner. This can provide a smooth, even surface to hang your wallpaper and help disguise any imperfections in the wall itself.
Ensuring that your wallpaper installation begins level is critical for both aesthetic and practical reasons.
By taking the time to properly measure and level your first sheet, you set yourself up for a smoother installation process and a more polished final product.
Remember, a little extra time spent on preparation can save you significant effort in corrections later.
4.Always Round Up Your Measurements
Whether you are a professional or not, you are going to make mistakes.
Accurate measuring is a cornerstone of successful wallpaper installation.
However, even with the most meticulous planning, errors can occur. To mitigate the impact of these mistakes and the challenges of discontinued styles, it's crucial to adopt a strategy of rounding up your measurements.
This approach ensures that you have enough material to complete your project with a professional finish.
The Necessity of Rounding Up Measurements
Minimise Impact of Errors
- Anticipating Mistakes: Errors in measurement are common, especially in complex rooms with many cuts or obstacles. Rounding up helps compensate for any underestimations.
- Adjusting for Walls and Ceilings: Walls and ceilings are rarely perfectly square or level. Rounding up allows extra material for adjustments to ensure wallpaper patterns align correctly.
Dealing with Discontinued Styles
- Limited Availability: Wallpaper patterns can be discontinued without notice. Purchasing extra rolls at the outset ensures that you have a consistent batch and color match.
- Future Repairs: Having additional wallpaper is also beneficial for making repairs in the future without the need to patchwork mismatched patterns or colours.
How to Round Up Effectively
Measure with Precision
- Use Reliable Tools: Utilise a laser measure or a standard tape measure to get the most accurate room dimensions.
- Double-Check Measurements: Always measure each wall at least twice to confirm your figures.
Calculate the Extra Material
- Add Safety Margin: After calculating the total square metres needed, add a 10-15% safety margin to account for cutting waste and pattern matching.
- Consider the Pattern Repeat: Wallpapers with large pattern repeats may require more extra material to align the designs across seams.
Ordering Extra Rolls
- Consult with Suppliers: Discuss with your supplier about the batch and colour consistency of your chosen wallpaper.
- Purchase Simultaneously: Ensure all rolls are from the same batch to avoid slight colour variations that can occur between different production runs.
Rounding up your measurements when ordering wallpaper is more than a precaution—it's a strategic approach to ensure a smooth installation process and long-term satisfaction with your wallcoverings.
By anticipating potential mistakes and discontinuations, you can avoid the frustration and additional costs associated with shortages and mismatches.
Always remember, it's better to have a little extra than not enough.
5.Know Where You're Going Before You Begin
A flawless wallpaper installation relies heavily on proper planning, particularly in terms of seam placement. Understanding and marking where your seams will fall before beginning the wallpapering process is crucial to avoid visual discontinuities and ensure a seamless finish. This guide explores why this preparation is essential and how to execute it effectively.
Importance of Planning Seam Placement
Avoiding Pattern Mismatch
- Visual Continuity: Seams are where two strips of wallpaper meet. If these aren't carefully planned, you might end up with a noticeable mismatch in the pattern, disrupting the wallpaper's aesthetic flow.
Enhancing Overall Appearance
- Strategic Seam Placement: Well-thought-out seam placement can enhance the room's appearance, making joins less noticeable and integrating them smoothly into the room's architecture.
How to Plan and Mark Seams
Tools Required
- Measuring Tape: To accurately measure the wall and determine the placement of the wallpaper strips.
- Level and Pencil: For marking precise, straight lines where the seams will align.
Step-by-Step Guide
- Measure the Wall: Start by measuring the total width of the wall and the width of the wallpaper roll. This will help you determine how many strips you will need.
- Calculate Seam Placement: Divide the wall width by the width of the wallpaper to calculate how many strips are needed. Use this information to determine where each seam will fall.
- Mark the Wall: Using a pencil and a level, lightly mark vertical lines on the wall where each seam will occur. Ensure these lines are straight and true to avoid angled seams.
- Consider Obstacles: Account for windows, doors, and other architectural features. Plan how the wallpaper will align around these obstacles to maintain pattern continuity.
Tips for Handling Complex Patterns
- Aligning Patterns: For wallpapers with complex patterns, ensure the design matches at the seams before cutting and hanging. This might mean allowing extra wallpaper at the top and bottom for trimming.
- Overlap and Double Cut: Some installers prefer the overlap and double-cut technique for invisible seams, especially with thicker wallpapers. This involves overlapping strips slightly at the seams, then cutting through both layers for a perfect match.
Taking the time to measure and mark where your seams will be is a fundamental step in wallpaper installation that can dramatically affect the finished look. Proper seam planning ensures that patterns flow beautifully across the wall without unsightly interruptions. By meticulously preparing for where each strip of wallpaper will go, you can achieve a professional-quality finish that enhances the decor of any room.

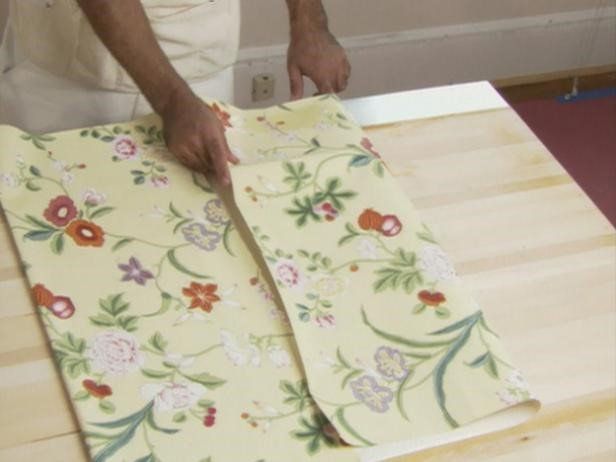
6.Always Book the Wallpaper
Booking wallpaper is a crucial step in the preparation process that many may overlook, yet it plays a significant role in ensuring a smooth, seamless finish. Understanding the technique of booking, which involves folding and resting the wallpaper after applying adhesive, is essential for professional-looking results.
Here's why this step is vital and how to properly book your wallpaper.
The Importance of Booking Wallpaper
Preventing Expansion on the Wall
- Control Expansion: Wallpaper tends to expand when adhesive is applied. Booking allows it to expand before it's placed on the wall, preventing misalignment of patterns and uneven seams.
- Avoid Bubbles and Creases: It also helps the adhesive penetrate the wallpaper more evenly, reducing the likelihood of air bubbles and creases once the wallpaper is hung.
How to Properly Book Wallpaper
Step-by-Step Guide
- Apply the Adhesive:
- Even Coating: Spread a consistent layer of adhesive over the back of the wallpaper strip using a brush or roller. Ensure the entire surface is covered, paying special attention to the edges.
- Fold the Paper:
- Gentle Folding: Fold the ends of the wallpaper strip towards the middle without creasing them. The adhesive sides should be touching each other.
- Top to Middle, Bottom to Middle: This should leave a small gap between the folds at the center, preventing the adhesive from squishing out.
- Let It Rest:
- Booking Time: Allow the booked wallpaper to rest for about five minutes. This resting period lets the adhesive activate and the paper to fully expand.
- Check Manufacturer’s Recommendations: Always refer to the wallpaper manufacturer's guidelines for specific booking times, as some types of wallpaper might require a longer or shorter booking period.
Handling Different Types of Wallpaper
- Pre-Pasted and Non-Pasted: Both types of wallpaper benefit from booking. Pre-pasted wallpapers require activation by water, while non-pasted wallpapers need an applied adhesive. Both should be booked to allow for expansion.
- Vinyl and Heavy Textures: Be particularly careful with vinyl and heavily textured wallpapers as they can be less permeable. Ensure the adhesive is adequately absorbed before booking.
Tips for Effective Booking
- Room Temperature: Perform the booking process in a room at a normal temperature to ensure that the adhesive behaves consistently.
- Avoid Overbooking: Leaving the wallpaper booked for too long can cause the adhesive to dry out, making it difficult to stick properly when applied.
Booking is a simple yet crucial step in wallpaper installation that should not be overlooked. By allowing for controlled expansion and proper adhesive activation, booking ensures that the wallpaper adheres smoothly and uniformly, preventing common issues such as bubbles, creases, and misaligned seams.
With careful attention to booking, your wallpaper installation will result in a flawless finish that beautifully enhances any space.
7.Start With Smooth Walls
Achieving a flawless wallpaper finish starts long before the wallpaper and adhesive come into play. The initial and perhaps most critical step in the wallpaper installation process is ensuring that your walls are perfectly smooth. This preparation is key to preventing imperfections from showing through the wallpaper and to ensuring strong adhesion.
The Importance of Smooth Walls
Enhanced Adhesion
- Strong Base: Smooth walls provide a solid base that enhances the adhesive qualities of the wallpaper glue, ensuring that the wallpaper sticks evenly and stays adhered over time.
Aesthetic Quality
- Seamless Look: Any bumps, cracks, or texture on the wall can show through the wallpaper, disrupting the visual smoothness of your wall coverings.
Steps to Prepare Your Walls
1. Inspecting the Surface
- Identify Imperfections: Before any preparation begins, carefully inspect your walls for cracks, holes, peeling paint, or any other imperfections.
- Plan Repairs: Note these areas and plan to address each one, as even small imperfections can become noticeable once the wallpaper is applied.
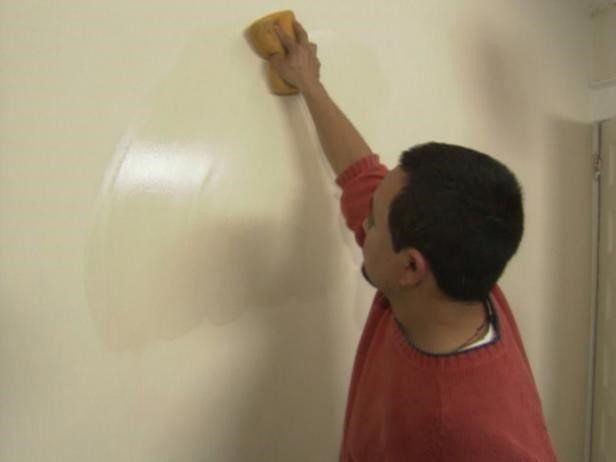
2. Cleaning and Sanding
- Sanding the Walls:
- Tools Needed: Use fine-grit sandpaper or a sanding block to gently sand the wall surface.
- Purpose: This step removes minor textural irregularities and old paint flakes, creating a smoother base.
- Wiping Down Walls:
- Cleaning Mixture: Mix a light detergent with water to create a cleaning solution.
- Using a Sponge: Dip a sponge into the solution and wring it out so it’s damp but not dripping. Wipe down the walls to remove dust and any residual particles from sanding.
- Drying: Allow the walls to dry completely before proceeding. Moisture left on the walls can interfere with adhesive application.
3. Priming the Surface
- Applying Primer: Once the walls are clean and smooth, apply a primer suitable for wallpaper. This step is crucial for surfaces that might absorb too much adhesive or for helping the wallpaper adhere better and be more easily removable in the future.
- Type of Primer: Use a primer specifically designed for wallpaper if available, especially in rooms with higher moisture like kitchens and bathrooms.
Tips for Achieving Smooth Walls
- Allow Ample Time: Don’t rush the preparation process. Give yourself plenty of time to smooth out and prime the walls before the wallpaper installation day.
- Check Lighting: Use a bright light to check the wall from different angles to ensure all imperfections are addressed. This is particularly important in natural light, which can reveal flaws missed under artificial lighting.
Starting with a smooth wall is non-negotiable for a professional-quality wallpaper installation. This preparation ensures that the final appearance is seamless and that the wallpaper adheres properly without peeling or bubbling. By taking the time to properly prepare your walls—sanding, cleaning, and priming—you set the stage for a stunning transformation of your space.
Don't Panic If You See Bubbles
Air bubbles are a common issue during wallpaper installation, often causing unnecessary panic. Understanding that bubbles can be a normal part of the installation process and knowing how to effectively handle them ensures that your wallpaper will have a smooth, professional finish. Here’s what you need to know about managing air bubbles during and after wallpaper application.
Understanding Air Bubbles
Why Bubbles Form
- Air Entrapment: Bubbles typically occur when air is trapped between the wall and the wallpaper during application. This can happen due to uneven wall surfaces, hurried application, or failing to smooth out the paper fully as it's applied.
Natural Settling
- Drying Process: As the wallpaper adhesive dries, it often contracts slightly, which can naturally pull the wallpaper tight against the wall and eliminate many smaller bubbles.
Handling Bubbles During Installation
Immediate Action
- Smooth Out While Wet: Using a wallpaper smoother or brush, gently work from the center of the bubble to the edges to push out trapped air while the adhesive is still wet.
Be Patient
- Allow Time to Settle: Before taking drastic measures, allow the wallpaper to fully dry. Many smaller bubbles will disappear as the glue sets and the paper fully adheres to the wall.
Dealing with Persistent Bubbles
Tools Needed
- Pin or Fine Needle: A small pin or needle will be used to puncture the bubble without causing noticeable damage to the wallpaper.
- Wallpaper Sweep or Smoother: This tool is used to gently flatten the area after puncturing the bubble.
Step-by-Step Guide
- Identify Persistent Bubbles: Once the wallpaper is dry, examine the surface for any bubbles that have not disappeared.
- Puncture Carefully: Gently puncture the center of the bubble with a pin or fine needle. The hole should be tiny enough to be invisible but sufficient to release the trapped air.
- Press the Air Out: Using a wallpaper smoother or soft cloth, gently press around the punctured area, working outward from the puncture to flatten the wallpaper and ensure it adheres smoothly to the wall.
Preventative Measures
Proper Wall Preparation
- Smooth Surface: Ensure the wall is as smooth and clean as possible before starting. Any dust or debris can create air pockets.
Correct Adhesive Application
- Even Spread: Apply a consistent layer of adhesive, paying close attention to edges and corners where bubbles are more likely to form.
Technique Matters
- Rolling from the Middle: When applying each strip of wallpaper, start from the middle and work outward. This method helps minimize the chance of trapping air.
Conclusion
Seeing bubbles during wallpaper installation shouldn't cause panic. Most bubbles will resolve themselves as the wallpaper adhesive dries. For those that linger, a simple and careful puncture technique can remedy the issue without damaging the aesthetics of your wall covering. By understanding how to manage and prevent air bubbles, you can ensure a smooth, professional finish in your wallpaper installation.
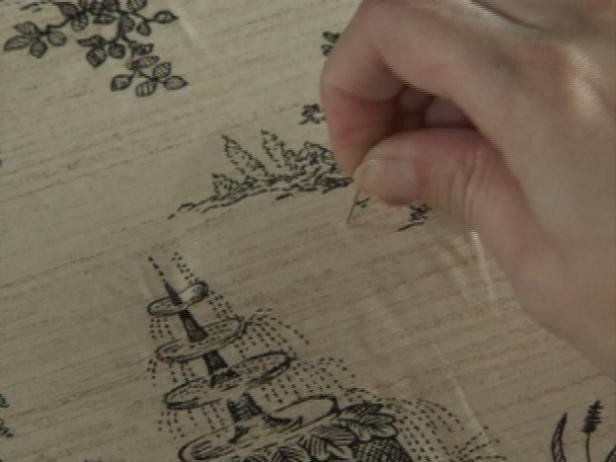
Don't Re-Use Razors
Using a sharp, fresh razor is a crucial yet often overlooked aspect of successful wallpaper installation. The condition of the blade can significantly impact the precision and neatness of your cuts, affecting the overall quality and appearance of the wallpaper once applied. Here’s why it’s important to always use a new razor blade and how doing so can enhance your installation process.
The Importance of Using Fresh Razors
Precision Cutting
- Clean Edges: A sharp razor ensures clean, crisp cuts. Blunt blades can lead to jagged or torn edges, which can ruin the look of an otherwise flawless installation.
- Accurate Trimming: Wallpaper installation often requires trimming excess paper and cutting around obstacles like window frames and electrical outlets. Precision is key in these cases to avoid excess wastage and misaligned patterns.
Avoiding Damage
- Preventing Rips: A dull blade may drag or snag on the wallpaper, causing tears or rips that can be difficult or impossible to repair.
- Enhancing Adhesion: Clean cuts help ensure that edges lay flat and adhere properly, preventing peeling or lifting at the seams.
Tips for Managing Razor Usage
Have Extras on Hand
- Stock Up: Since razor blades are inexpensive, it’s wise to start any wallpaper project with a good supply. This ensures that you can change blades the moment you feel any resistance during cutting.
Change Blades Regularly
- Frequency of Changes: Depending on the type of wallpaper and the number of cuts, you might need to change blades after every room or even more frequently if cutting through thicker or textured papers.
Choosing the Right Blades
- Type of Razor: Use high-quality utility knife blades designed for precision work. These are typically sharper and more durable than general-purpose blades.
Handling and Disposal of Used Blades
Safety First
- Careful Handling: Always handle blades with care, using a blade dispenser and a safe technique to avoid cuts.
- Proper Disposal: Dispose of used blades in a blade disposal container or an old can to prevent injury. Never throw loose blades directly into the trash.
Environmental Considerations
- Recycling Options: Look into recycling options for metal blades in your area, as many recycling centers accept metal tools for recycling.
The use of fresh razors in wallpaper installation cannot be overstated. By ensuring that you have a supply of sharp blades, you can avoid common pitfalls such as uneven cuts and damage to your wallpaper. Regularly changing your razor blades during the project is a small but critical step that can significantly influence the quality of your installation. This practice not only enhances the effectiveness of your work but also contributes to a safer working environment.
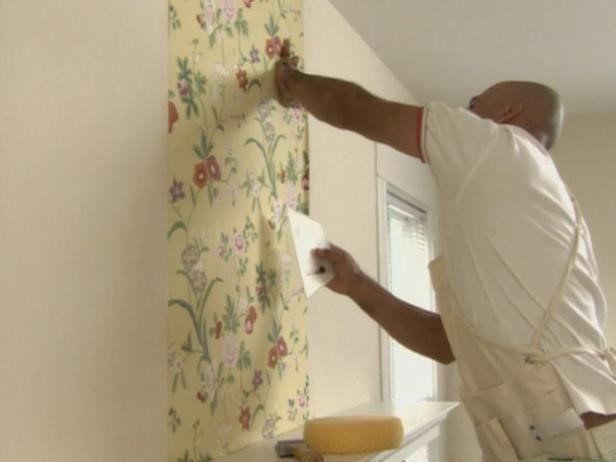
Use a Wallpaper Sweep
While there are various tools available for assisting with wallpaper installation, the choice between using a wallpaper sweep versus a brush can significantly affect the outcome of your project. A wallpaper sweep, also known as a smoother or a squeegee, is specifically designed to facilitate smoother and more effective application of wallpaper. Here’s why using a wallpaper sweep is recommended and how to effectively utilize this tool.
The Importance of Using a Wallpaper Sweep
Effective Smoothing
- Air Bubble Removal: A wallpaper sweep is excellent for gently pushing out air bubbles without damaging the paper. Its broad, smooth edge offers a large surface area that disperses pressure evenly, reducing the risk of creating tears or punctures.
- Enhanced Adhesion: Using a sweep helps firmly adhere the wallpaper to the wall surface, ensuring that the glue binds effectively and uniformly. This is crucial for preventing future peeling.
Uniform Application
- Consistency: The rigid yet flexible edge of a wallpaper sweep allows for consistent pressure across the wallpaper, helping achieve a uniform application. This is particularly important for achieving visually pleasing seams and edges.
Choosing and Using a Wallpaper Sweep
Selecting the Right Sweep
- Material Considerations: Most wallpaper sweeps are made from soft plastic or rubber, which are gentle on delicate papers. Choose a sweep that feels comfortable in your hand and matches the size of the area you will be working on.
- Flexibility and Firmness: Ensure the sweep is flexible enough to maneuver around curves and into tight spaces but firm enough to apply adequate pressure.
Technique for Using a Wallpaper Sweep
- Start at the Top: Begin at the top of the wallpaper strip and gently sweep downward in smooth, overlapping strokes. Always move from the center of the paper toward the edges to expel any trapped air toward the sides.
- Handle Seams Carefully: When smoothing down seams, use gentle pressure to avoid squeezing out too much adhesive, which can weaken the bond.
- Repeat as Necessary: Go over each section multiple times to ensure thorough adhesion and to remove all air bubbles. Pay particular attention to the edges and corners.
Maintenance and Care of Wallpaper Sweeps
Cleaning After Use
- Wash Regularly: Clean your wallpaper sweep with warm soapy water after each use to remove any adhesive residue that could harden and impair its effectiveness.
- Dry Properly: Ensure the sweep is thoroughly dried before storing to prevent any warping or damage to the material.
Storage
- Safe Storage: Store your wallpaper sweep in a dry, flat position to maintain its shape and integrity. Avoid placing heavy items on top of it to prevent deformation.
The use of a wallpaper sweep is essential for achieving professional-quality results in wallpaper installation. Its design and functionality make it superior to brushes, which might not provide the same level of precision and care, especially with delicate wallpapers. By choosing the right sweep and mastering the correct techniques, you can ensure a flawless finish to your wallpapering project, enhancing the overall beauty and longevity of your walls.
Here’s a few useful items you will need to give your wallpaper hanging project that professional look!
Paint stripper
Paint stripper helps remove paint or glue from the surface. It comes in grades suited to various levels of stripping. To protect your skin and lungs from harmful chemicals, make sure you wear gloves and a mask when using paint stripper.
Tack cloth
These work like a debris magnet for cleaning off surfaces. Before you paint or finish a surface, it is crucial that it be clean and free of debris.
Wire wheel brush
These attached to a drill and works well for removing rust. A handheld wire brush will do the job if you don’t have a power drill.
A wallpaper steamer
If you are removing existing wallpaper you will need a steamer. They release steam onto the wallpaper which melts the glue and allows you to peel the paper off the wall. They work much like a clothes iron, but without a hot plate.
A heat gun
These are much like a hair dryer, used to melt existing paint from the wall. You will hold the gun close to the surface, and the paint will start to bubble off. Use a paint scraper to remove the softened paint.
Make sure you do not use a heat gun if the paint is lead-based.